Art DeCamp’s instruction and horn-making techniques were invaluable to me in making screw-tip horns. Thank you, Art, for the class and the extra help you provided. Art has a new web site at:
Part 3 will deal with the turning of the threaded tip. First let’s choose the tip. Keep in mind the proportions of the horn. We want the diameter and the length to look pleasing when attached to the horn. As long the blank is large enough for the length and diameter of the tip we want, we’re OK. In choosing the material, I looked for material that matched the horn reasonably well – at least I did the second time.
Art looked at my first choice and said, “Are you sure you want to use that piece?” I try to learn from mistakes and ended up with a piece that fit far better regarding color. I might add that sometimes as you turn, you uncover some very nice color variations. Other tip possibilities might include horn, antler, and wood.
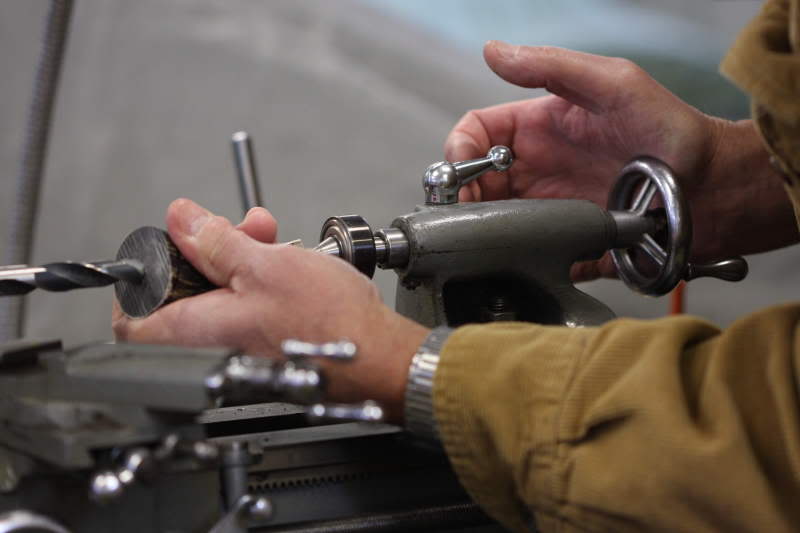
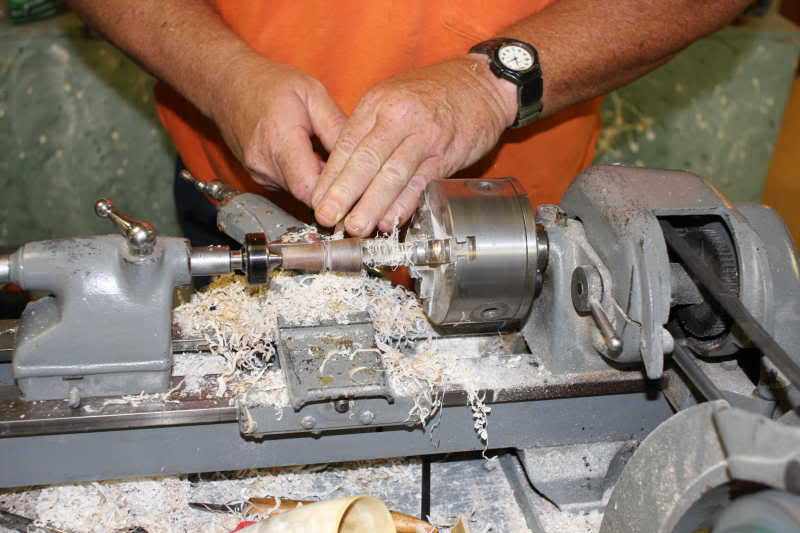
Once a choice was made, we began by drilling the tip for the threaded end and for the through hole. We found the center of each end and center drilled them. We chucked the bit for the threaded end in the lathe. We placed the tailstock against the other end to keep the blank centered. We held the blank in one hand and advanced the tailstock with the other. We used the graduations on the tailstock to drill the hole 9/16”deep.
Below – The end that eventually will be threaded is being drilled here. The bit size matches the the tap we plan to use.
Next we drilled the through hole. Here we used ¼” bit, drilling from both ends of the blank. The tailstock was always used to maintain the center.
Threading the large end comes next. We chucked the tap in the head stock and locked it. We used a ball-bearing center in tailstock and pushed against the small end of the tip to keep everything centered. We turned the blank by hand, keeping lube on the tap and reversing often to clean it.
Below – When tapping the tip, we chucked the tap and locked the chuck, turning the tip by hand. Pressure was added to the tail stock when starting the tap.
Below – Here I used a channel lock to turn the tip.
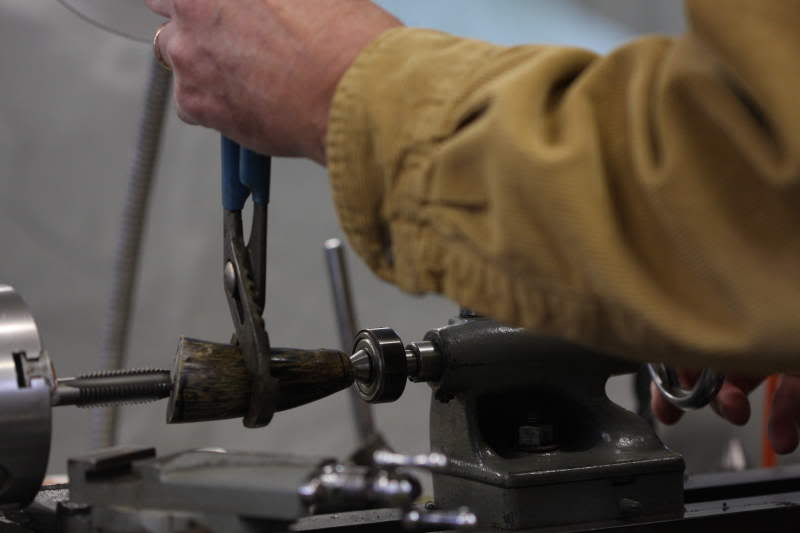
By going slowly you should have very nice threads. I had trouble with this step as I have damaged nerves in my hands and have no grip. Since the surface of the blank had not been finished, I used a channel lock to turn it. That has worked well for me here at home as well. This by itself is a good reason for turning the exterior last. When finishing up, you may want to use a bottoming tap to thread closer to the inside shoulder.
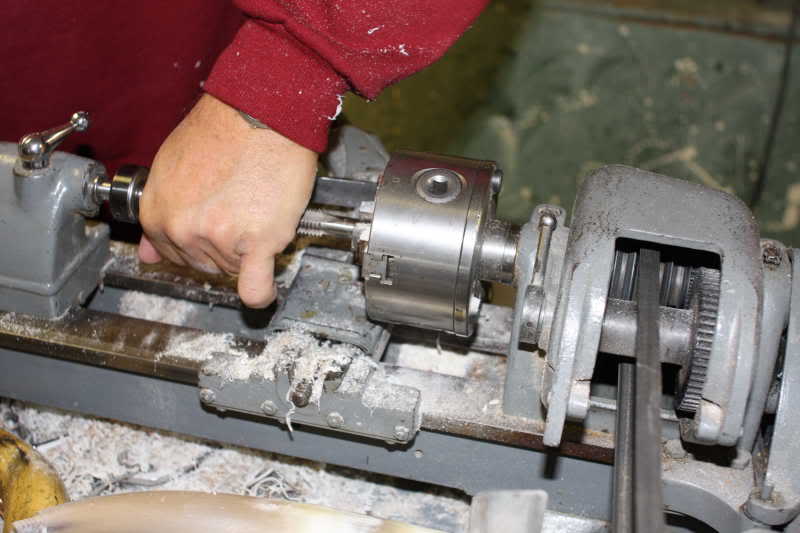
When turning the exterior, we left the tip threaded on the tap. We unlocked the chuck and used it to turn the tip. The ball-bearing center is used in the tail stock to support the small end of the tip. Again I liked using a scraper for this operation. I worked until the scraper was cutting all the way around and from end to end. This would be a good time to face off both ends of the tip.
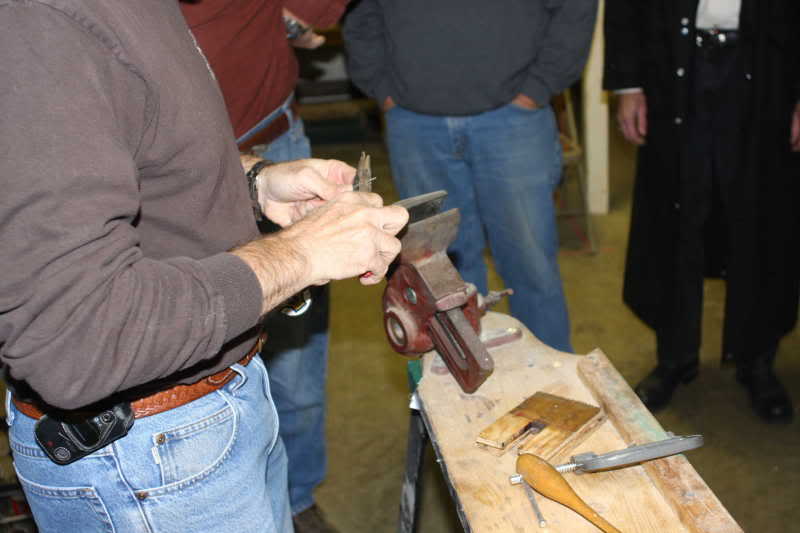
Below – Art assists a student with lathe technique.
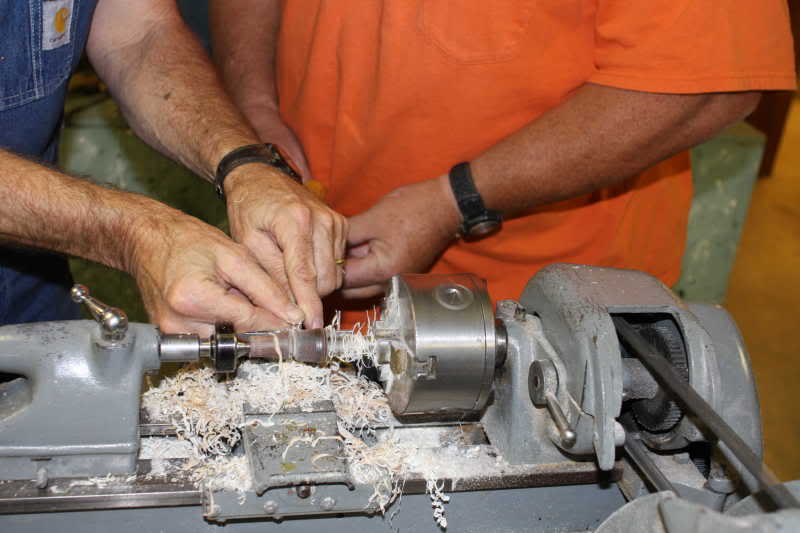
Below – A student begins cutting the tip’s profile.
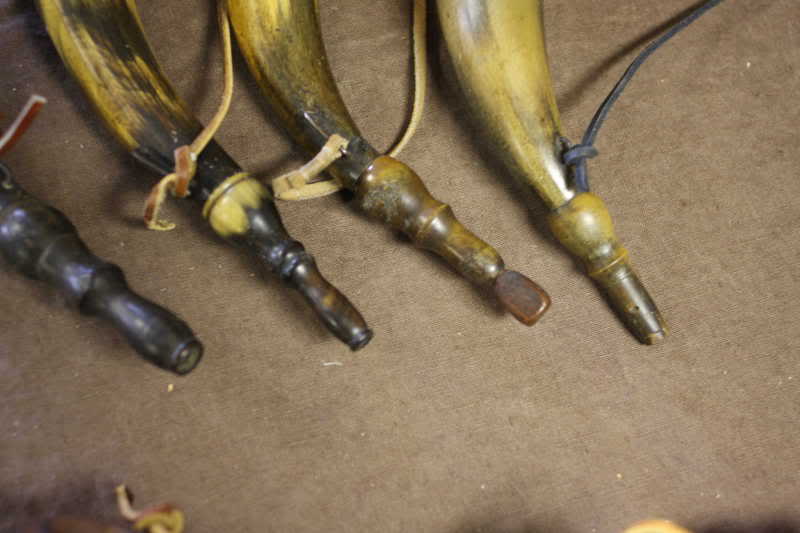
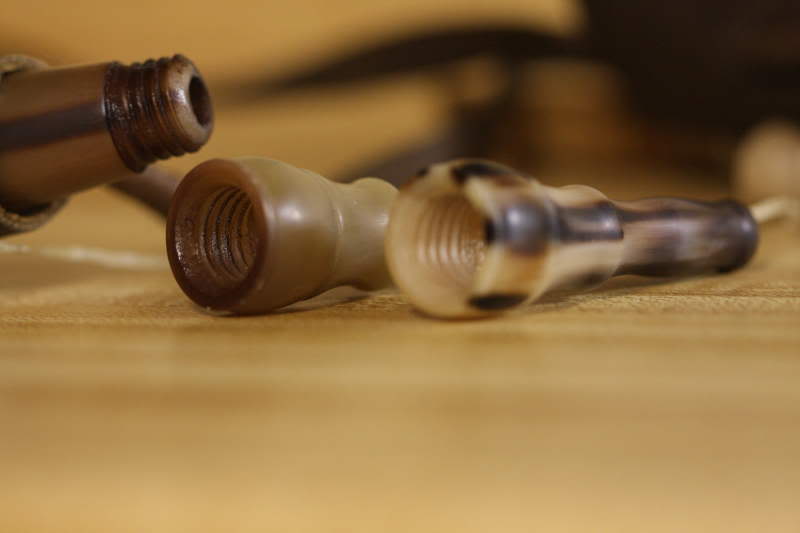
For the profile of the tip, again consider the type of horn. The profile of the tip used for this tutorial is in the style of the Lancaster shops. The diameter of the threaded end needs to be proportionate to the neck of the horn. The length, as well, should be in the style of the area. Pictured here are the tips of a number of original Lancaster horns that Art brought. Studying originals pays off here as well as in the study of the long rifle.
Below – Several original Lancaster tips
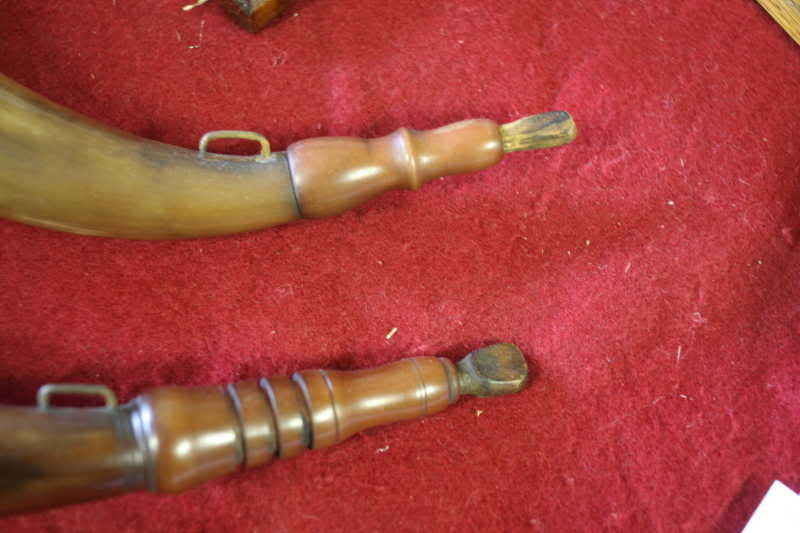
Below – Two of Art’s Lancaster tips
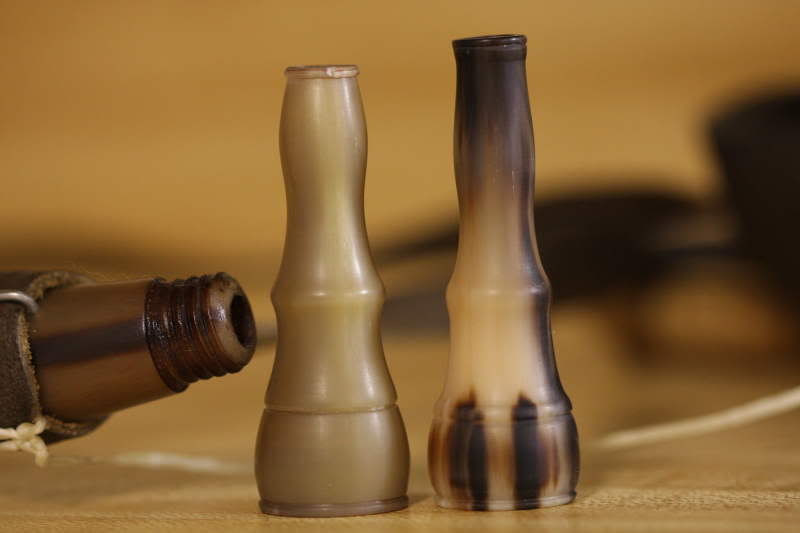
When I returned from the class I hunted through my scraps of horns for a piece to make another tip. I found a chunk of horn that had a nicely marbled tip inside. That tip is the one pictured in a number of the photos. The one turned at Conner Prairie is there, as well.
Below – The solid color tip on the left in the next two photos was done in Art’s class. The marbled one was from a horn chunk I found at home. Both fit on my Lancaster horn.
When finishing the tip, I like a faster lathe speed and do as much sanding on the lathe as possible. Stay with a grade of paper until all marks larger than the paper makes are gone. Each grit size after that should only have to remove the marks from the previous paper.
The class finished with 0000 steel wool. Be careful as the steel wool readily catches on the tap. Inevitably I do this no matter how much I try to prevent it. By this time, you should see no marks, and the sheen should have a buttery look.
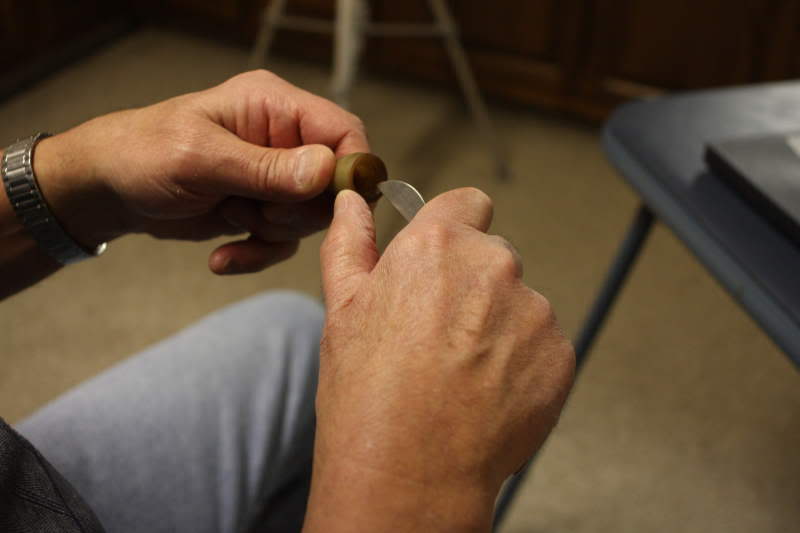
You are ready to fit the tip to the horn. It should turn on well, but I like a bit of lanolin here. As you turn it completely, you will notice that the tip won’t thread up to the shoulder of the horn. The incomplete threads are the likely culprit. A little carving with a knife on the threads of the tip will gradually bring the tip up to the shoulder. A little scraping on the first thread on the horn may help too. With a careful fit up against the horn shoulder, you are pretty much finished with the mechanics of building a screw tip horn.
Below – I’m paring away part of the outside thread to seat the tip.
The hole in the tip should now be tapered. A tapered reamer is a excellent for this. Another method that works well is to twist the handle of a file in the hole. I have used both. The amount of taper should be worked with the type of plug you intend to use.
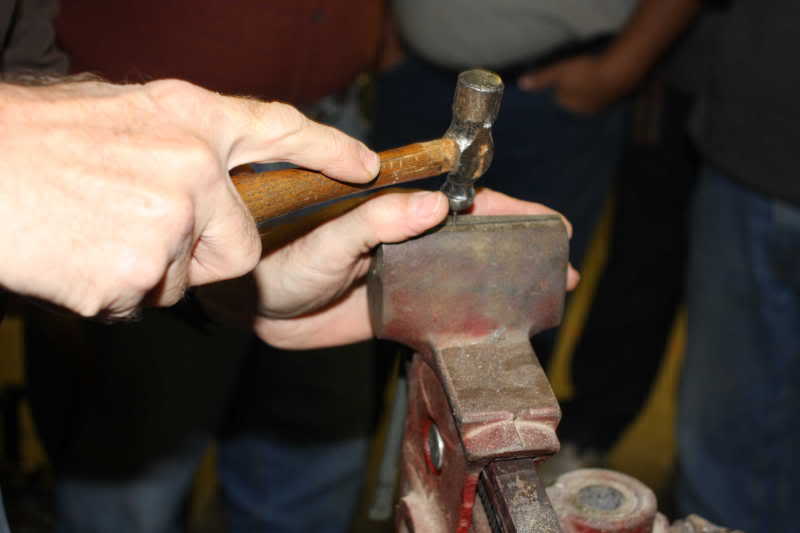
Attaching the plug can be done in a number of ways. If your plug-fitting job was a good one, you can blow through the spout and not hear air escape. A fit like this could be attached without bees wax, glue, etc. In class we made nails out of wire or brads, cold forging a head. The number of fasteners used will vary with regional styles. Art mentioned that he has seen as few as 4 and as many as a dozen plus. I used 5 on my horn. I drilled one size through the horn and into the plug, and then opened the horn very slightly to sink the nail head a bit. Based on regional styles, other materials may be used, such as wood pegs and locust thorns. If desired, you could use glue or wax on the taper. I have done that, but it was probably unnecessary.
Above – Art prepares cold forged nails for attaching the plug. Here he uses 1/16″ wire and Below shapes the head with a ball peen hammer.
Now that you’re done with the horn, look it over. This is the time to evaluate your project, looking for strengths and weaknesses. Think about how changing a proceedure might improve the quality of the horn. If you should choose to follow a style different than a Lancaster, note where changes should be made. I hope that completing a horn using this tutorial resulted in a horn you can be proud to carry.
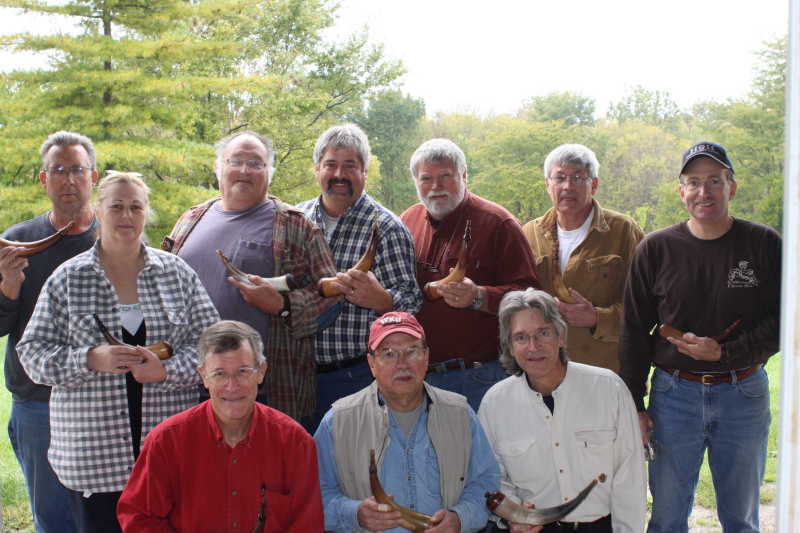
Above – This is the class photo from the 2009 Conner Prairie Class. Front row from left: ——-, Glenn Sutt, Jeff Bibb Middle: Ginny VanMeter Back row: —–, Dave Gundrum, Joe Rushton, Alan Hoeweler, Larry Pletcher, Art DeCamp Missing: Chuck Brownewell (I would like to add the names of the unnamed students if anyone can provide them.)
Return to Part 1: Making Lancaster Screw Tip Horns Part 1
Return to Part 2: Making Lancaster Screw Tip Horns Part 2
Go back to the Intro: Making Lancaster Screw Tip Horns Intro
Leave a Reply
You must be logged in to post a comment.