Art DeCamp’s instruction and horn-making techniques were invaluable to me in making screw-tip horns. Thank you, Art, for the class and the extra help you provided. Art has a new web site at: www.artspowderhorns.com
In this part we will discuss the preparation of the butt of the horn. This will involve trimming, shaping, and turning. We will also turn and fit the plug.
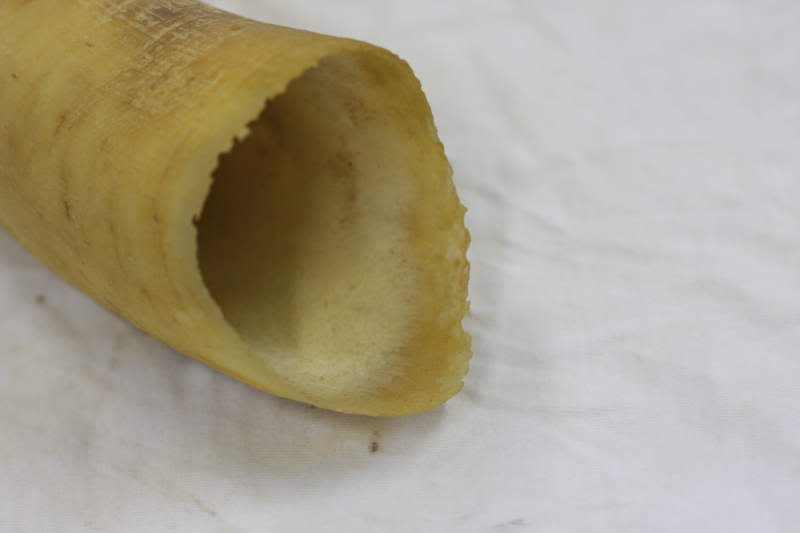
Let’s first look at the horn. There is probably material at the end that needs to be trimmed. Decide where to trim to get rid of any damaged or unflattering parts. Cut this part away as square as possible and use a disk or belt sander to make it as true as possible. When turning we will face off the end, and final edges will be cared for there.
Below – Notice the rough end of the horn before cutting off.
The horn will now be heated and made round. Art had a number of tapered forms which the class used. These can be made on the lathe. I have made a couple with mild tapers and will make additional ones as different size horns are made. With a suitable tapered form ready, the horn can be heated.
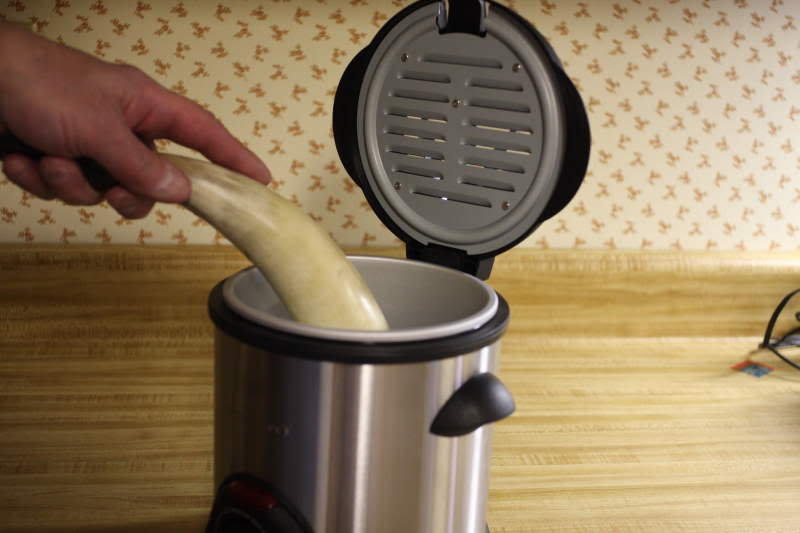
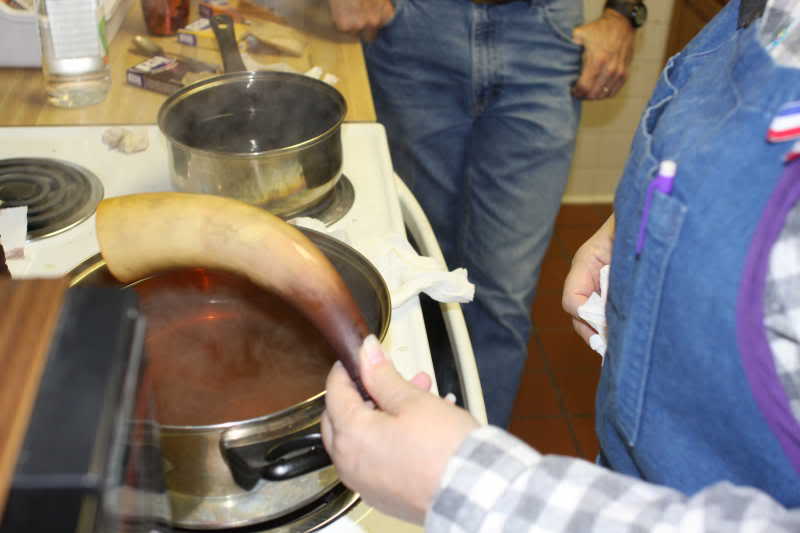
In Art’s class we used his small deep fryer filled with lard. We used a thermometer to keep the temperature no higher than 350 degrees. The horn is placed in the grease deep enough to heat it thoroughly. Be aware that since you have the spout end open, grease can run out if the horn is tipped up to look at the plug end. Watch how you hold the horn, being mindful of the open end.
Below – The horn is heated in hot oil.
A useful tip was given to us as we wondered how long to heat the horn. Before heating the horn, tap it on the side of the fryer and listen to the hard clicking sound. When the horn is heated enough, a tap on the side of the fryer will give a dull thunk – very different from the sound you heard before heating. This was very useful to me. I dunked the horn for a few seconds, tapped it on the side, dunked again, repeating until I got that dull thunk. Shake off the oil and push the form inside the end. Push the form into the horn until the horn completely conforms to the round form. If it doesn’t, another heating is necessary.
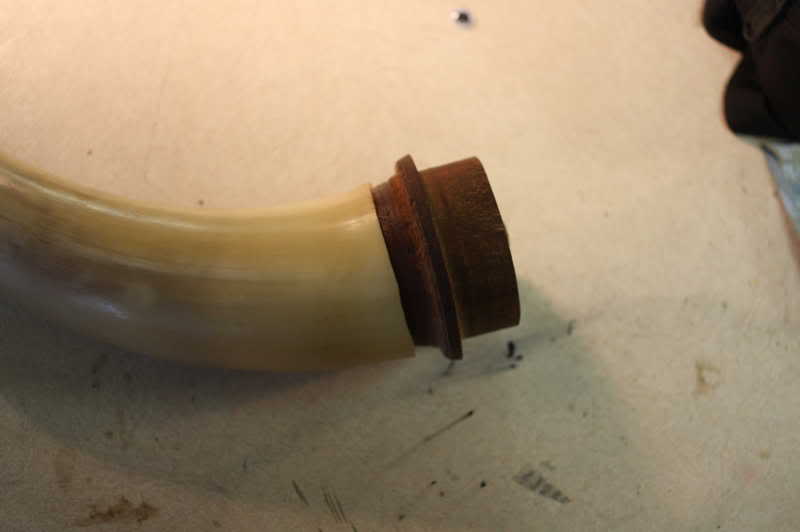
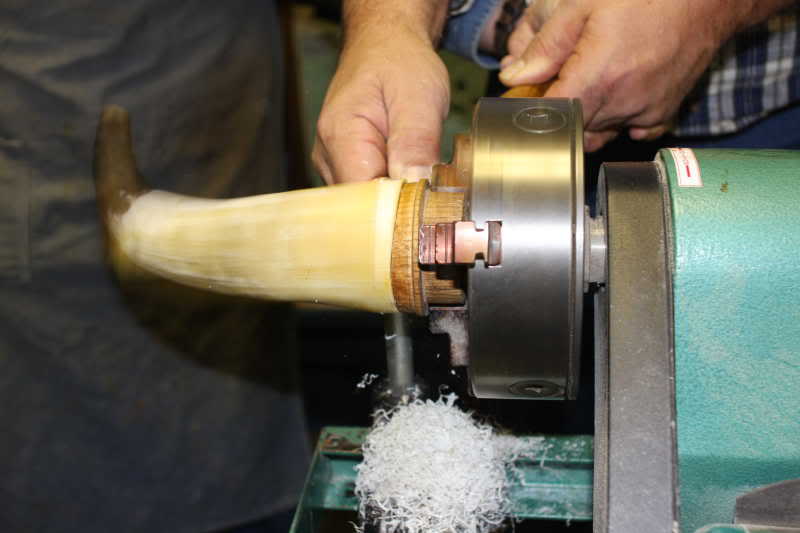
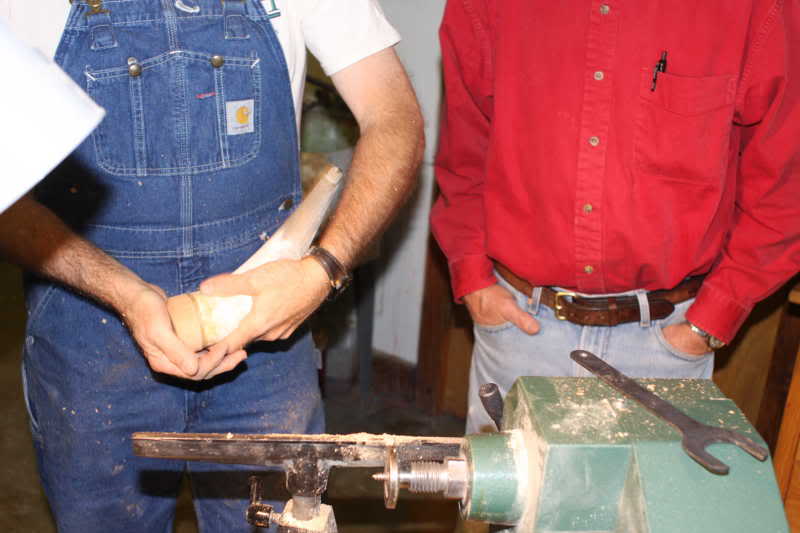
Below – The plug is installed in the horn and is ready for turning.
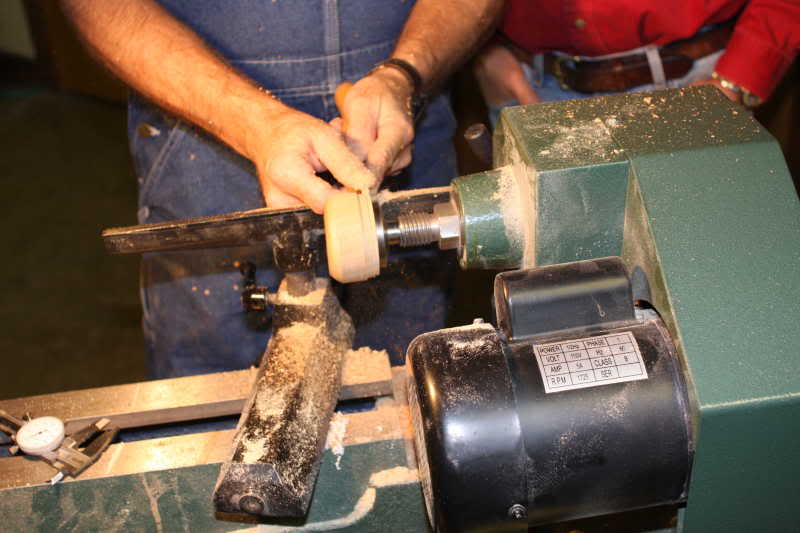
Below – Jeff Bibb is turning the the wall thickness and then parting off, providing a clean edge for fitting the plug.
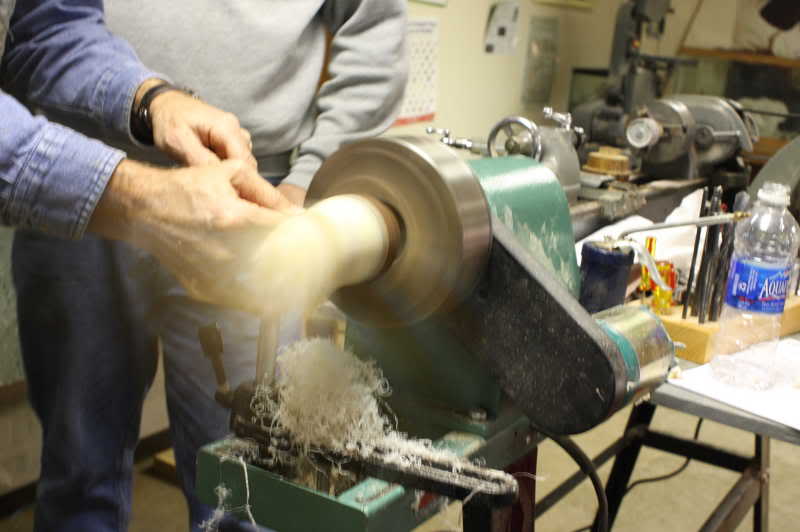
With the forming step complete, we know that the horn is round on the inside. If the wall thickness was the same, the outside would be concentric with the inside. Obviously this will not be the case, and we must turn the exterior so that it is uniform in thickness. With the form still in the horn, the form now becomes the mandrel that is chucked in the lathe. Here again the lathe speed must be quite slow. If my lathe was a variable speed, I would start slowly and gradually increase the speed until the tools cut well – probably under 200 rpm. A scraper is a good tool to use. We want to cut the thick parts down to the same thickness as the thinnest part. Another way to put this is that we want to stop when we are cutting all the way around the horn. As you get close you may want to change tools to a skew. Your lathe experience will come into play here. Stop though, just as soon as you are cutting all the way around. Now would be the time to part off the horn to give a perfect fit to the plug.
A couple of unexpected things may happen as you begin turning the butt. If any oil remained in the horn, it will be flung from the end of the horn as you turn on the lathe. Count on that happening, even it you tried to wipe out the horn. I’d stand to one side as you start the lathe the first time. Once the lathe has run briefly, the oil will be gone.
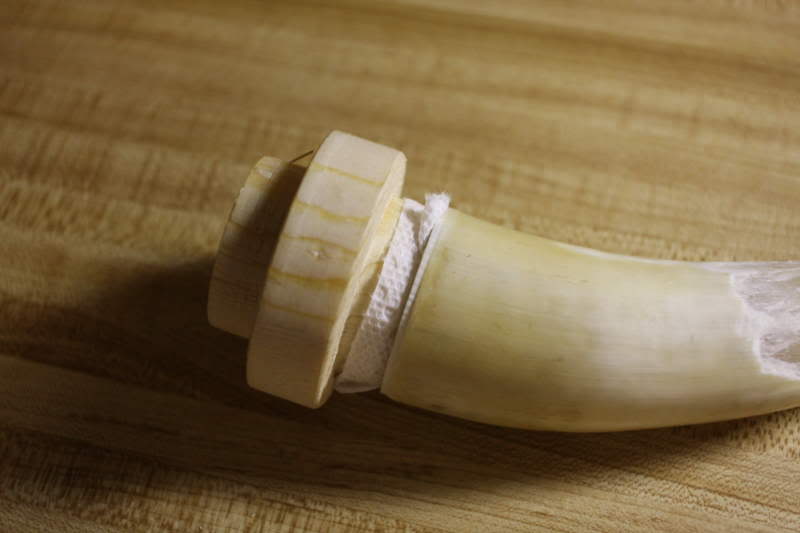
Another possibility is that the horn may come flying off the mandrel. If the taper of the mandrel matches the taper of the horn fairly well, this is less likely to happen. If the horn needs to be reattached, try a piece of damp paper towel over the mandrel, and then push the horn firmly on. In class we had some horns fly off more that once, but we still managed to get them turned concentric.
Below – The wet paper towel trick is being used to reattach the horn to the plug/mandrel.
Below – I use a draw knife to peel back material from the shoulder behind the threads.
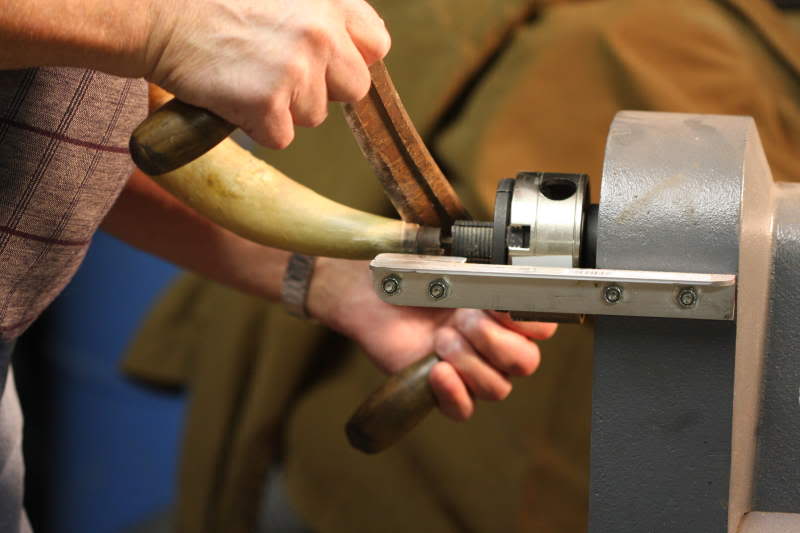
The horn body can be worked down any time. Whatever tools you are comfortable using can now be used to work from tip to butt. Art’s use of the drawknife saved us much rasping. Art does this while the tap is in the spout and the horn is still in the lathe. He simply pries up on the material on the shoulder and peels it back. When using this method, always work from the tip to butt because of the way the horn fibers run out as you go toward the butt.
My experience with finishing a horn is that I always find scratches that I thought were gone. In class I thought I had the horn done quite well until it came out of the dye. When dyed, all kinds of marks suddenly appeared. The dye made the flaws much easier to see. After hearing other horn makers mention this, I may do a quick dye job just to make the flaws show up – planning the real dye work later.
With the horn largely done, we need to turn a plug. If you are making a screw tip styled after a particular location, some research will help. In our class we used cherry, as it was commonly used and turns well. Other fruit woods were mentioned also. (I had a chance to get some apple wood and will try it on my next horn.)
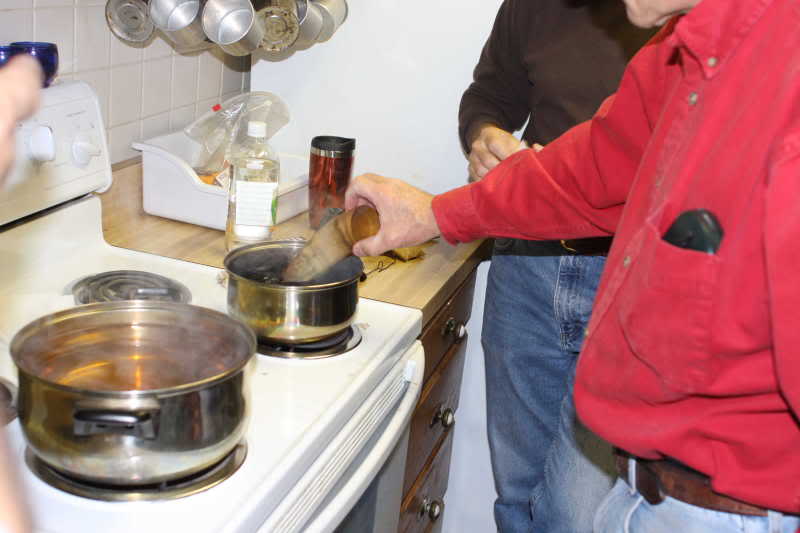
Below – Art uses an inside/outside caliper and does a trial fit of the cherry plug.
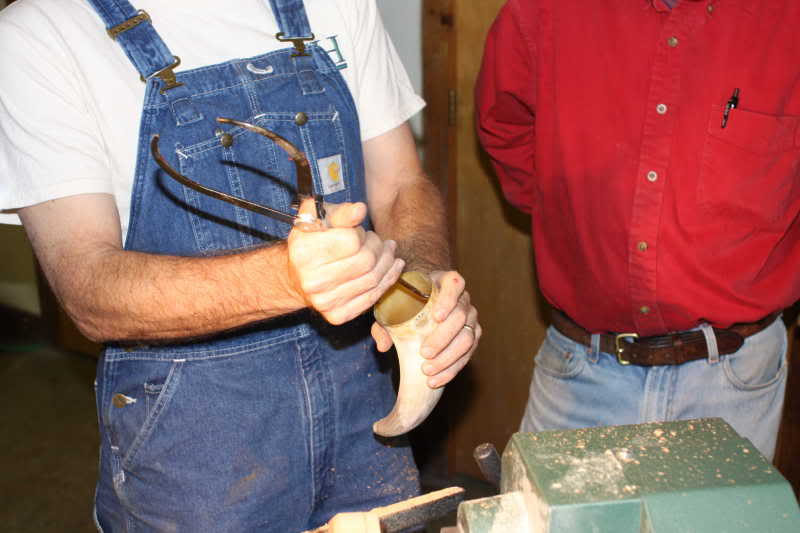
Inside and outside calipers will be useful tools in turning the plug. From a square piece of cherry, I located the center and drew a circle to the exterior dimension of the plug. For depth, I left enough for the taper inside the horn as well as enough to chuck in the lathe. I cut the corners off the piece to save extra lathe work. In Art’s class we used a face plate with a center screw.
Measure the exterior of the horn and turn the plug down close to the final dimension. Determine where the shoulder will be and measure the inside diameter of the horn with an inside caliper. With a parting tool, carefully cut down to the inside diameter. Keep the shoulder of the cut straight, as this is where the horn will fit. Now work the taper to match the taper of the horn. An inside-outside caliper is a great tool for this. You can find the diameter of the horn at the depth of the taper and work toward the shoulder you have already determined. At this point you will need to remove the plug from the face plate and see how it fits the horn. You will probably need to do this a couple of times. With each try, mark the tight places with a pencil, reattach to the face plate, and remove wood carefully from the tight places. (I use a slightly different method of fitting the plug because of a different type of lathe chuck. See the editor’s note in the Intro.)
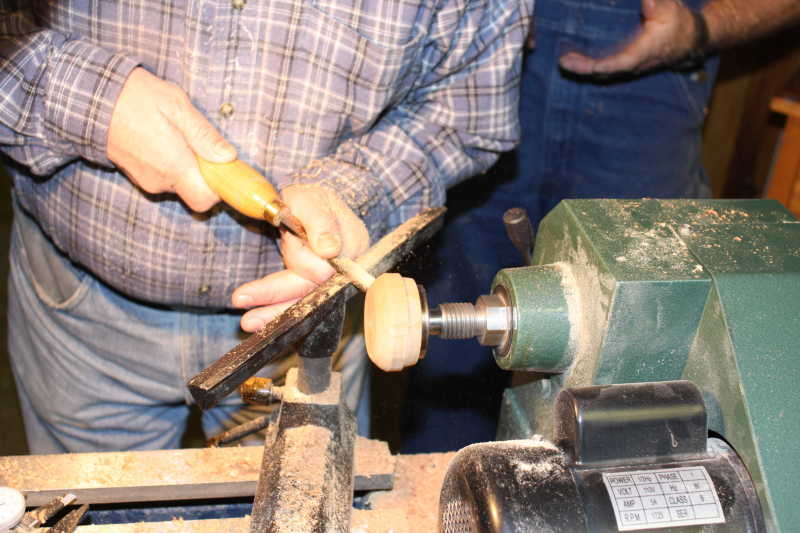
Below – Art uses a parting tool to cut the inside diameter of the plug.
Below – A student cuts the final shape of the plugs exterior.
When your plug fits well, begin turning the final shape to the exterior. Keep in mind the style of the horn and tip you are making. Your plug style should be in keeping with the rest of the horn. As you work to the final shape, carefully match the diameter of the horn. With some exceptions, you will want to match the horn’s diameter.
Sand and finish the plug. I like to do as much of this on the lathe as possible. Extra time spent here will be worthwhile. Various finishes work well. I used lanolin (Bag Balm) on my last horn and plug. I will probably use it again.
You may wish to dye the horn or add some protective finish. Because I had so many marks show up after dying the horn in class, I refinished my horn at home. I tried to use the same techniques as we used in class. My horn was dyed with a yellow and brown dye in two separate pots. I started with yellow and then a little brown on the tip end. One of the last trips into the yellow, I added a small amount of orange. The screw tip didn’t go into the dye because I liked the buttery caramel color without. The horn, plug, and tip were rubbed with lanolin as the final step. I think lanolin is good for both horn and wood plug.
Below – Art discusses the dying techniques he uses. Here he adds his secret ingredient – a “carelessly” measured amount of white vinegar.

Below – A student’s horn comes out of the yellow dye.
Below – Another student is using the brown dye to darken the spout end.
At this point your horn should be done except for the screw tip – the part that gives this style of horn its name. This will be the subject of Part 3.
Return to Part 1: Making Lancaster Screw Tip Horns Part 1
Go to Part 3: Making Lancaster Screw Tip Horns Part 3
Go back to the Intro: Making Lancaster Screw Tip Horns Intro
Leave a Reply
You must be logged in to post a comment.