Art DeCamp’s instruction and horn-making techniques were invaluable to me in making screw-tip horns. Thank you, Art, for the class and the extra help you provided. Art has a new web site at:
When you select a horn, there are some dimensions that should be considered. For Part 1 we will deal with preparing the tip end of the horn. For the horn used in this Tutorial a 5/8″x11 thread will be used for the screw tip. We will be drilling a 5/16″ spout hole. To turn the exterior threads we will need to turn the spout end to .600”. These facts should be considered as you select your horn. We need a tip that has enough solid material to do these operations. There is nothing magic about the tap and die sizes mentioned above. You might decide to use ½” for the exterior and ¼” for the spout, based on the size of the horn.
First let’s begin by cutting off the end. I determine where to cut by going away from the tip until the horn is at least .600” thick. The cut can be made with a hacksaw. Envision the hole you will drill and cut as square to that as you can. However we will face off the end later on the lathe.
Before you drill the horn it will be helpful to know how long the solid part is. Take a wire and push it into the open end. By holding the wire outside the horn you can tell how deep the hollow part is. This can be marked on the side of the horn.
Now drill the tip. I filed the end smooth so the bit wouldn’t slip. In fact it would be a good idea to center drill to insure that your starting point is in the center. Art suggested that we drill the hole with the finished bit size. He said that often “chasing” a smaller bit with a larger one may cause the larger bit to catch.
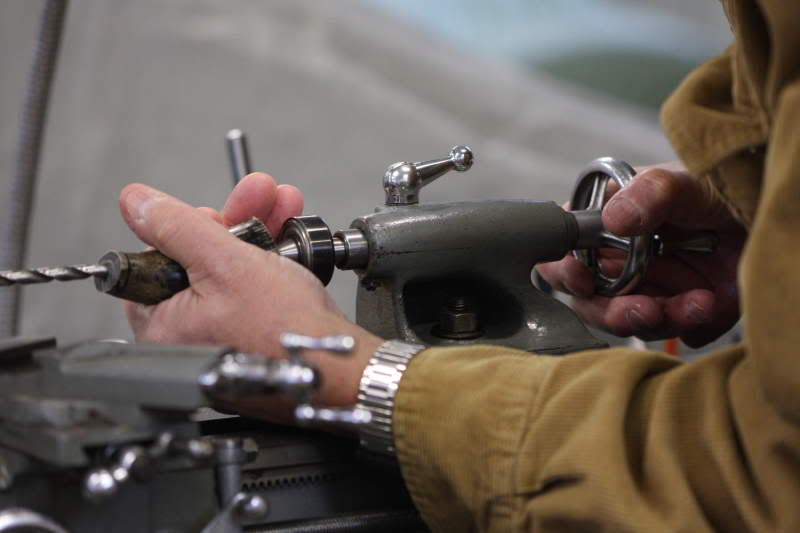
It helps to watch the drilling process from two planes. In Art’s class we chucked the 5/16” bit in the lathe and drilled horizontally. I looked straight down while Art looked horizontally. He would help to adjust me if I wasn’t straight from his perspective. Two sets of eyes are better than one, especially with this being my first screw tip. It is important to note that the angle of the screw tip is determined by this hole. All spout work will be determined by the drilling angle of this first hole.
Below – Back home from class, I’m drilling the spout without the second pair of eyes.
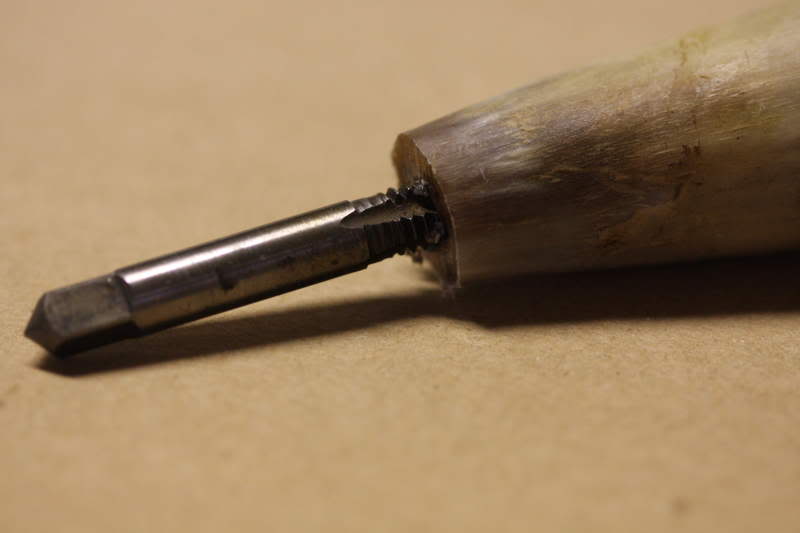
Our next step is to turn the tip to .600” in the lathe. To hold the tip in the lathe, we thread the hole we drilled. By threading the hole and leaving the tap screwed in place, we can chuck the end of the tap in the lathe. (Some makers remove the tap and screw in a 5/16” bolt with the bolt head cut off.) We tapped the hole by hand using oil for a lube. At home I have tried things like Crisco or Lanolin (Bag Balm).
Below – The spout is tapped. We’ll leave the tap in place to use it to chuck in the lathe.
The use of a lathe to turn the end for exterior threads needs some explanation. Because the horn is curved, it can’t be concentric with the lathe center. At normal lathe speeds it would flop terribly. Art’s lathe has an electronic speed control. We estimate that we ran at 80 -130 rpm. (The slow speed on my wood lathe is around 900 rpm – too fast for this operation.)
When turning the tip, we need at least ½” of threads to screw the tip to. So we will turn at least ½” of the horn to .600” inch. I think I turned mine back at least 9/16”. When turning this section I used a scraper and a skew to finish. I took the horn to “round” and then used a caliper and a parting tool to get down to .600”. Once you have gotten to .600”, the diameter of the horn spout should be considered. Turn the spout “round” behind the threaded portion to the diameter you want the screw tip to tighten up against. This horn will be thinned to the shoulder diameter with a rasp or draw knife. (Note this shoulder in the photo just below. The use of a rasp to shape the spout will be covered in part 2.)
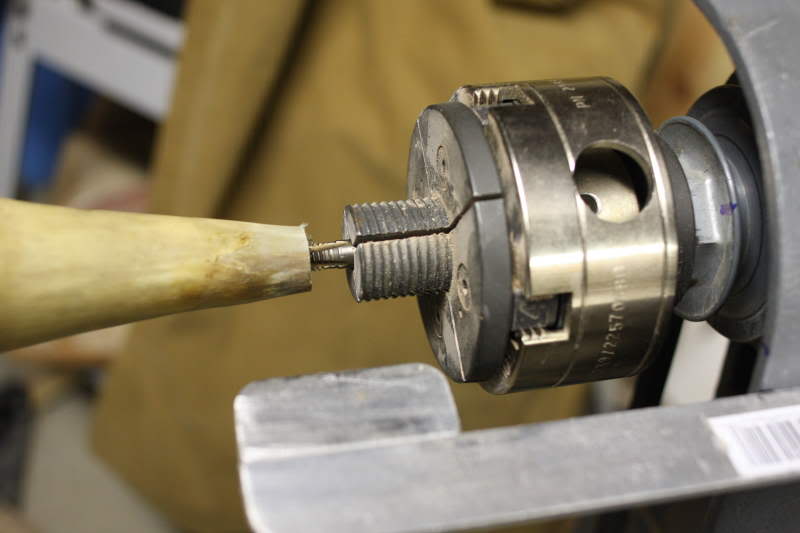
Below – (DeCamp photo) The tap is chucked in the lathe.
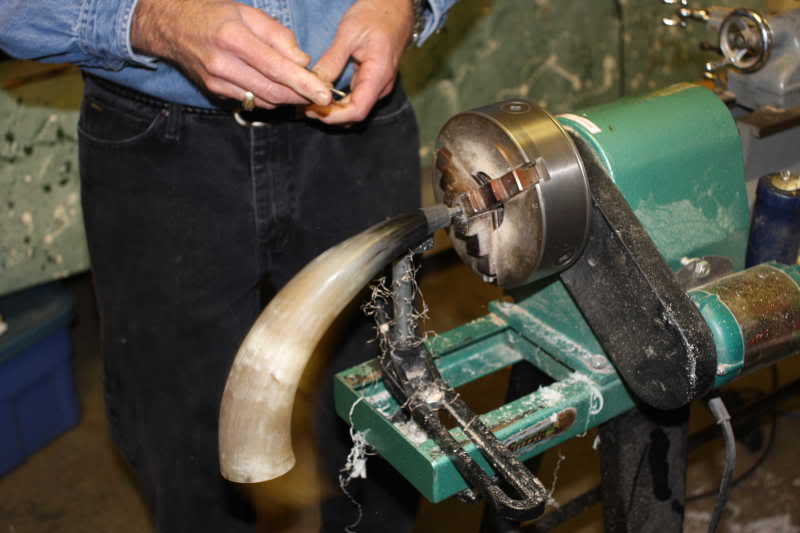
Below – Jeff Bibb is preparing to turn the spout for the 5/8×13 die.
Before removing the horn from the lathe, face off the turned end. You will lose a small bit of length doing this; that is why you turned the round part a little long. When facing off, take care keep the parting tool from touching the tap. You can always file any small amount away after the tap is removed.
Now we’re ready to thread the turned exterior. Art showed us a threading guide to use when starting the die. See the photo. These can be made on a metal lathe. (I used a piece of threaded rod and drilled a hole centered in one end. This hole is tapped for the size used to tap the interior of the spout hole.)
Below – (DeCamp photo) The horn is shown with the die and the threading guide.
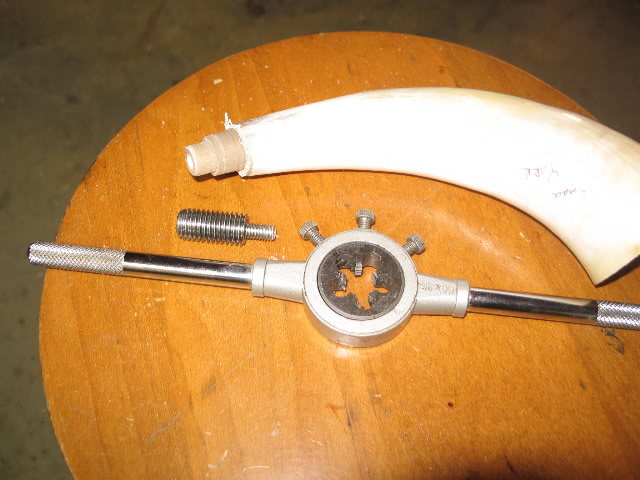
Below– (DeCamp photo) The threading guide is installed. We will add lube and cut the exterior threads.
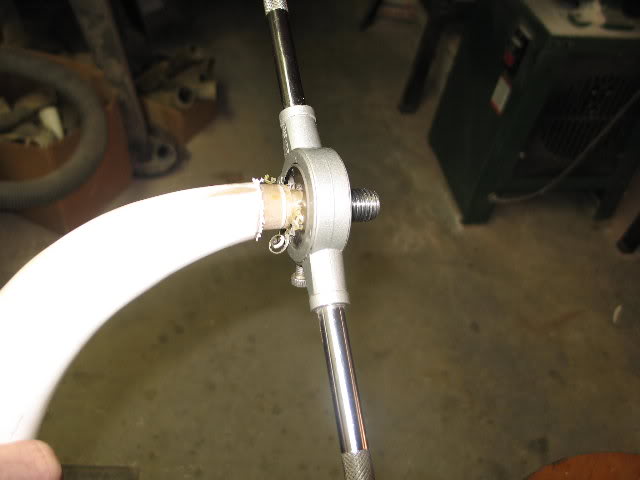
Thread on the guide and lube the horn. Spin the die unto the guide then begin threading. With lube, the horn should thread easily. I spin off the die and reverse it, and spin it back on backwards. This will cut the threads closer to the shoulder. Remove the die and the threading guide. You should have perfectly formed exterior threads, all ready for the screw on tip. In the next part we will prepare the butt of the horn and turn the plug.
Go to Part 2: Making Lancaster Screw Tip Horns Part 2
Go to Part 3: Making Lancaster Screw Tip Horns Part 3
Go back to the Intro: Making Lancaster Screw Tip Horns Intro
Leave a Reply
You must be logged in to post a comment.